
How to shoot and edit dreamy photos
Every now and then, someone asks how I create that dreamlike look in my photos — the kind of images that feel soft, cinematic, a bit otherworldly. The funny thing is, dreamy photography isn’t really about some well kept secret . It isn’t limited to golden sunsets. It isn’t reserved for people with fancy film cameras. And it definitely isn’t about everything being super sharp and technically perfect.
It’s about feeling.
Dreams aren’t neat. They’re a bit fuzzy and imperfect. Sometimes warm and nostalgic, sometimes darker and moody. If we want our images to feel dreamlike, we need to lean into that idea rather than cling to technical specifics.
Whether you’re shooting on a mirrorless camera, film, or even your phone, the approach is the same:
Dreamy photos = how you shoot + how you edit.

Creating a feeling with dreamy photography
Below is exactly how I do it. A blend of shooting techniques, lens choices, filters, timing, and a simple editing workflow that softens highlights and adds glow without going over the top.
What makes a photo dreamy?
When most people think ‘dreamy’ they think soft golden light. And yes, soft light helps but dreamy photos don’t have to be light, bright, and warm. Dreams can feel surreal, eerie, cinematic, empty, emotional, nostalgic or even unsettling. The point is: you define the mood. There are no rules here, and that’s why shooting this way is so enjoyable. It’s deliberately anti-perfectionist.
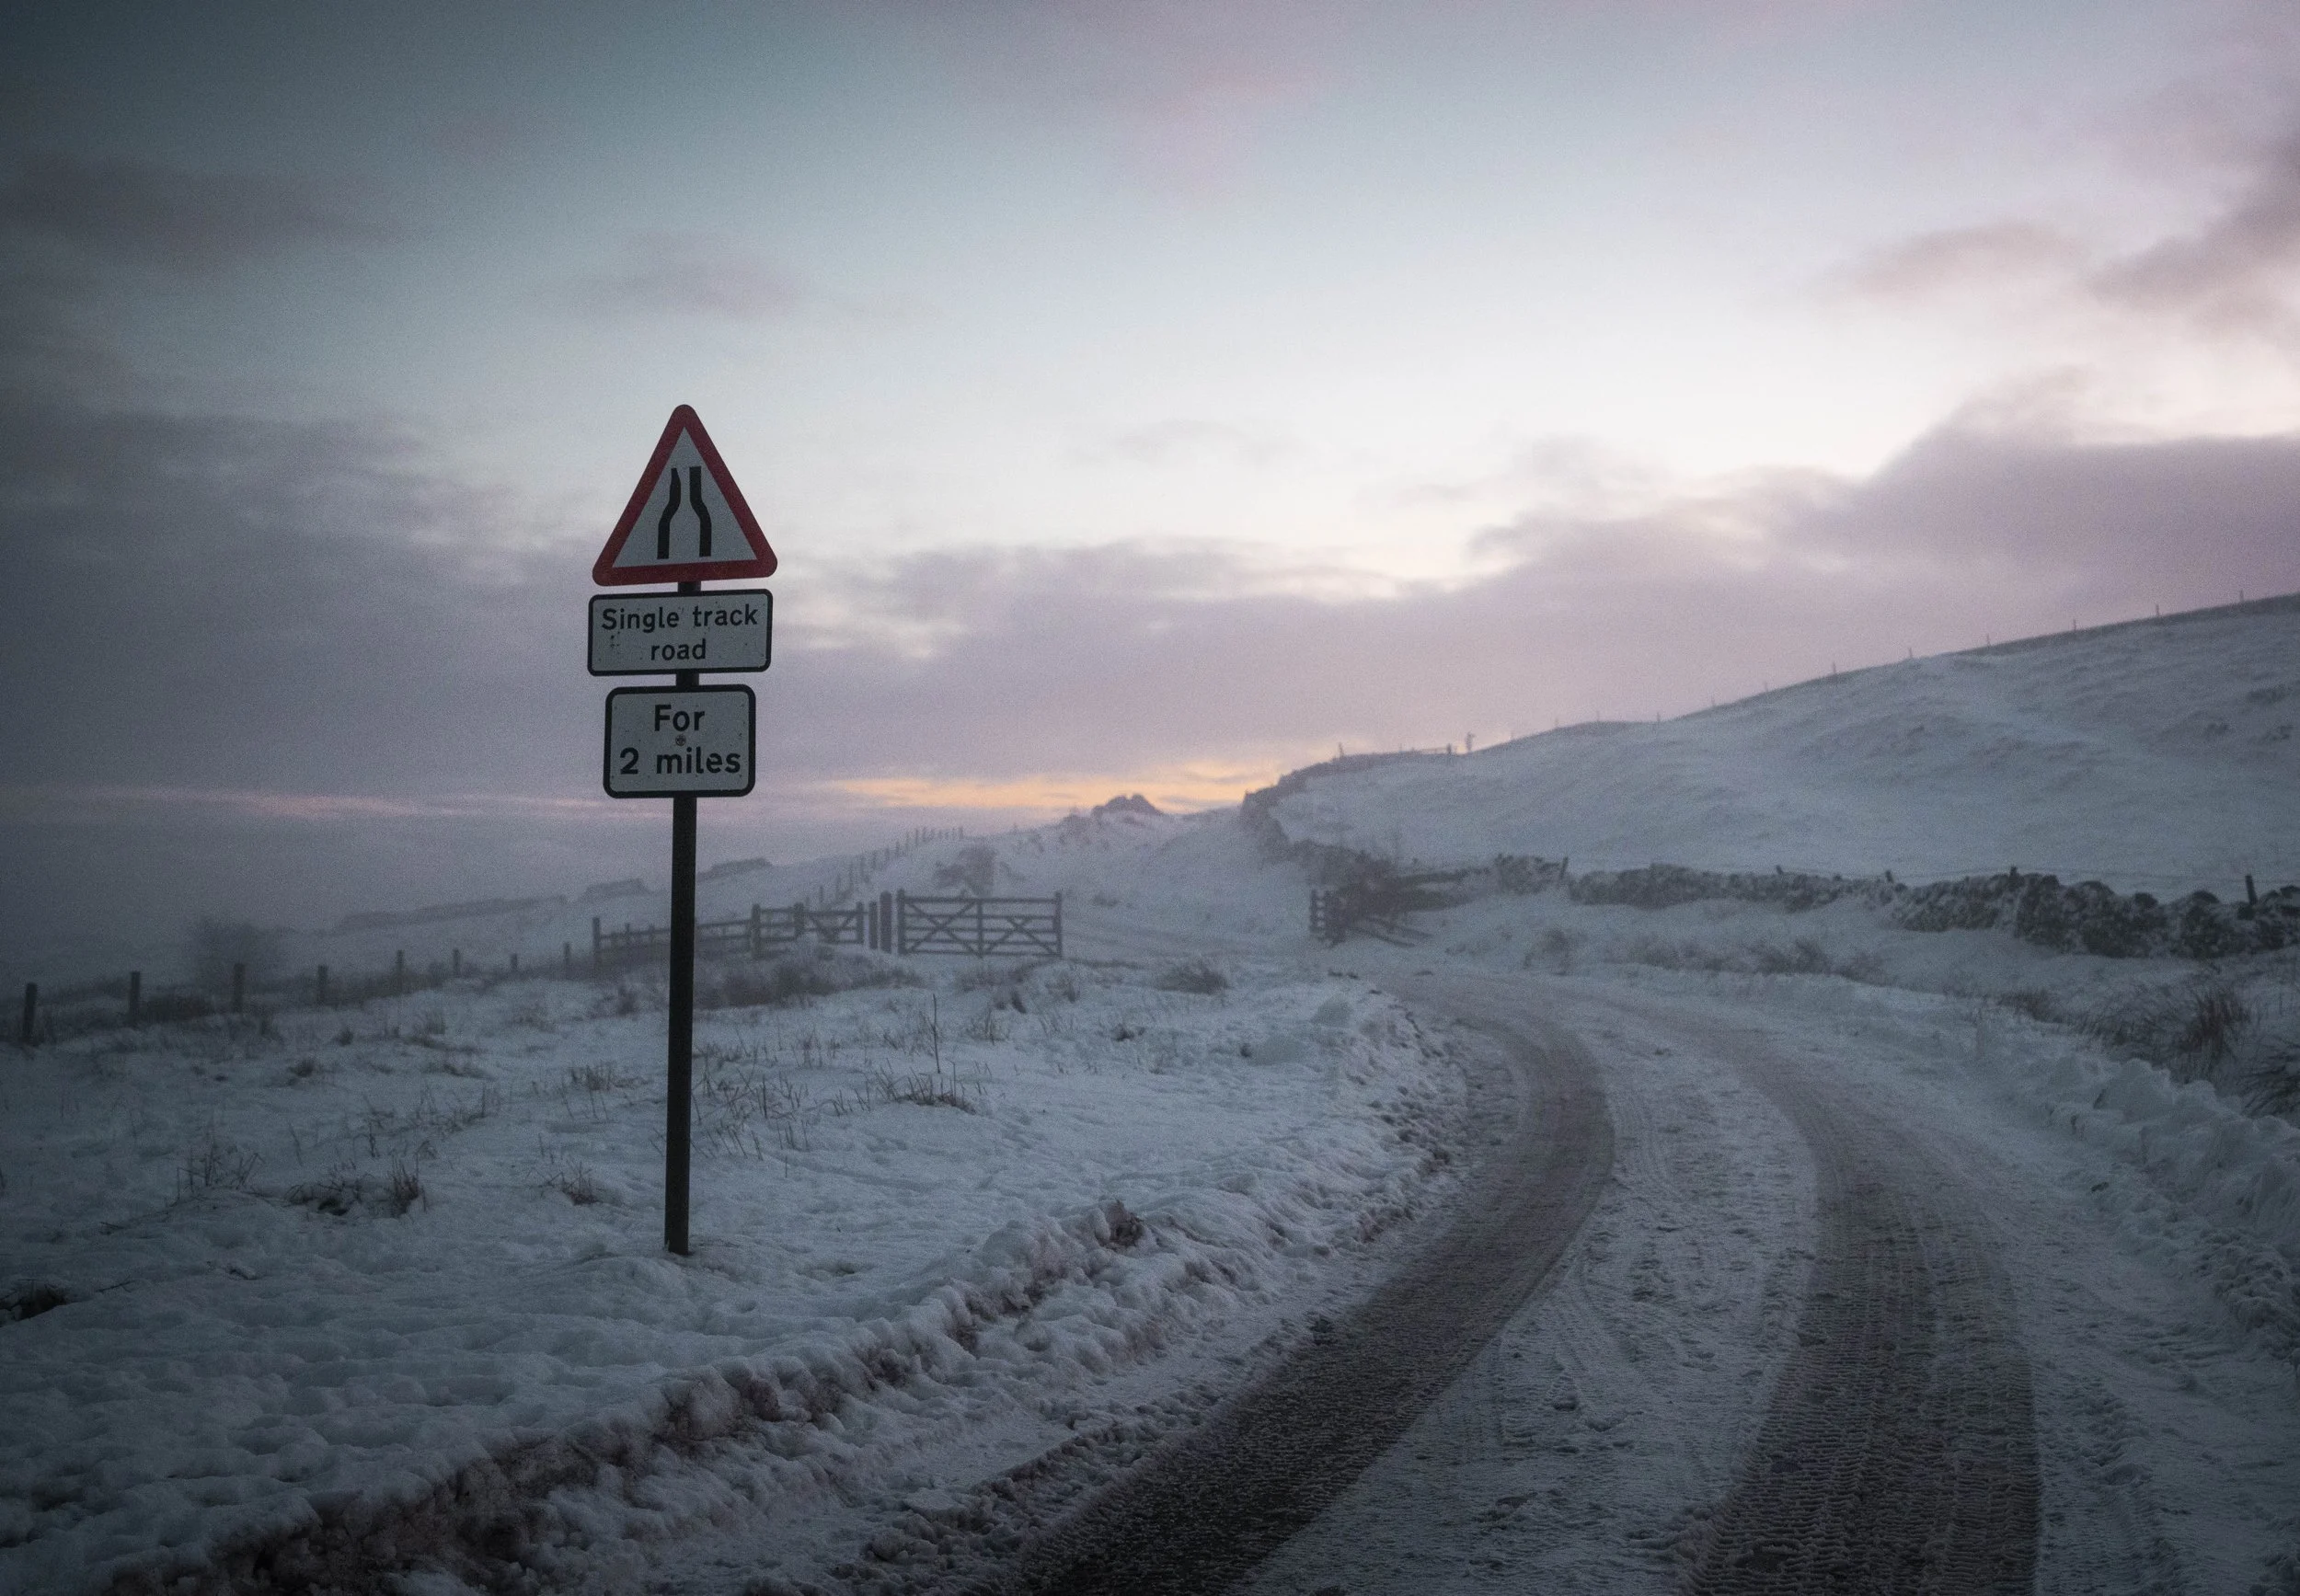
A favourite dreamy image that I overlooked for some time
How to shoot dreamy photos
There are three parts to this: Kit, technique, and timing.
1. The Gear (and why modern lenses hold you back)
Your choice of camera doesn't really matter. What can matter is the lens you pick. Modern lenses are almost too good - they resolve everything perfectly, which can make images feel clinical and too real, the opposite of dreamy.
To add character, try:
Vintage lenses
– Helios 44-2 (and it’s characteristic swirly bokeh)
– Voigtlander lenses with lower micro-contrastAnamorphic lenses for stretched flare and soft edges
Diffusion / mist filters
– I use a K&F Black Pro Mist 1/8 or 1/4 depending on the camera
– They add glow to highlights, soften contrast, and make light sources bloom beautifully
Film photography also naturally gives you glow, grain, halation and imperfection but it’s not required. It’s just another way to lean into the aesthetic.

Shot on Harman Phoenix 200 35mm film
2. The Shooting Technique
The biggest shift for most people is realising that dreamy photos aren’t created by settings alone, they’re created through composition and attitude.
Some things I lean into:
• Imperfection - Shoot handheld. Don’t worry about high ISO. Grain helps. Blur helps.Sharpness obsession kills the vibe.
• Space- Dreamy images breathe. Open compositions, negative space, room for the viewer to imagine something beyond the frame.
• Backlighting - Shooting into the light (sun, streetlights, reflections, artificial lighting) instantly softens the scene. Mist filters make this effect even stronger.
• Conditions - Fog, mist, drizzle, winter light, hazy evenings are all perfect. Even a supermarket car park on a freezing night can create magic.
• Experimentation - This is the heart of the style. Try new techniques. Try weird places. Try odd angles. Many of my favourite images came from experimenting - not planning.
3. Timing & Light
Yes, golden hour works beautifully, but you can shoot dreamy photos anywhere, anytime, if you understand how to soften harshness.
Midday sun is harsh → mist filter helps
Winter light is naturally softer → ideal for dreamy work
Artificial light at night + mist filter → instant cinematic glow
Fog or haze → nature’s built-in diffusion layer
Again, it’s less about the ‘perfect’ conditions and more about how you use them.
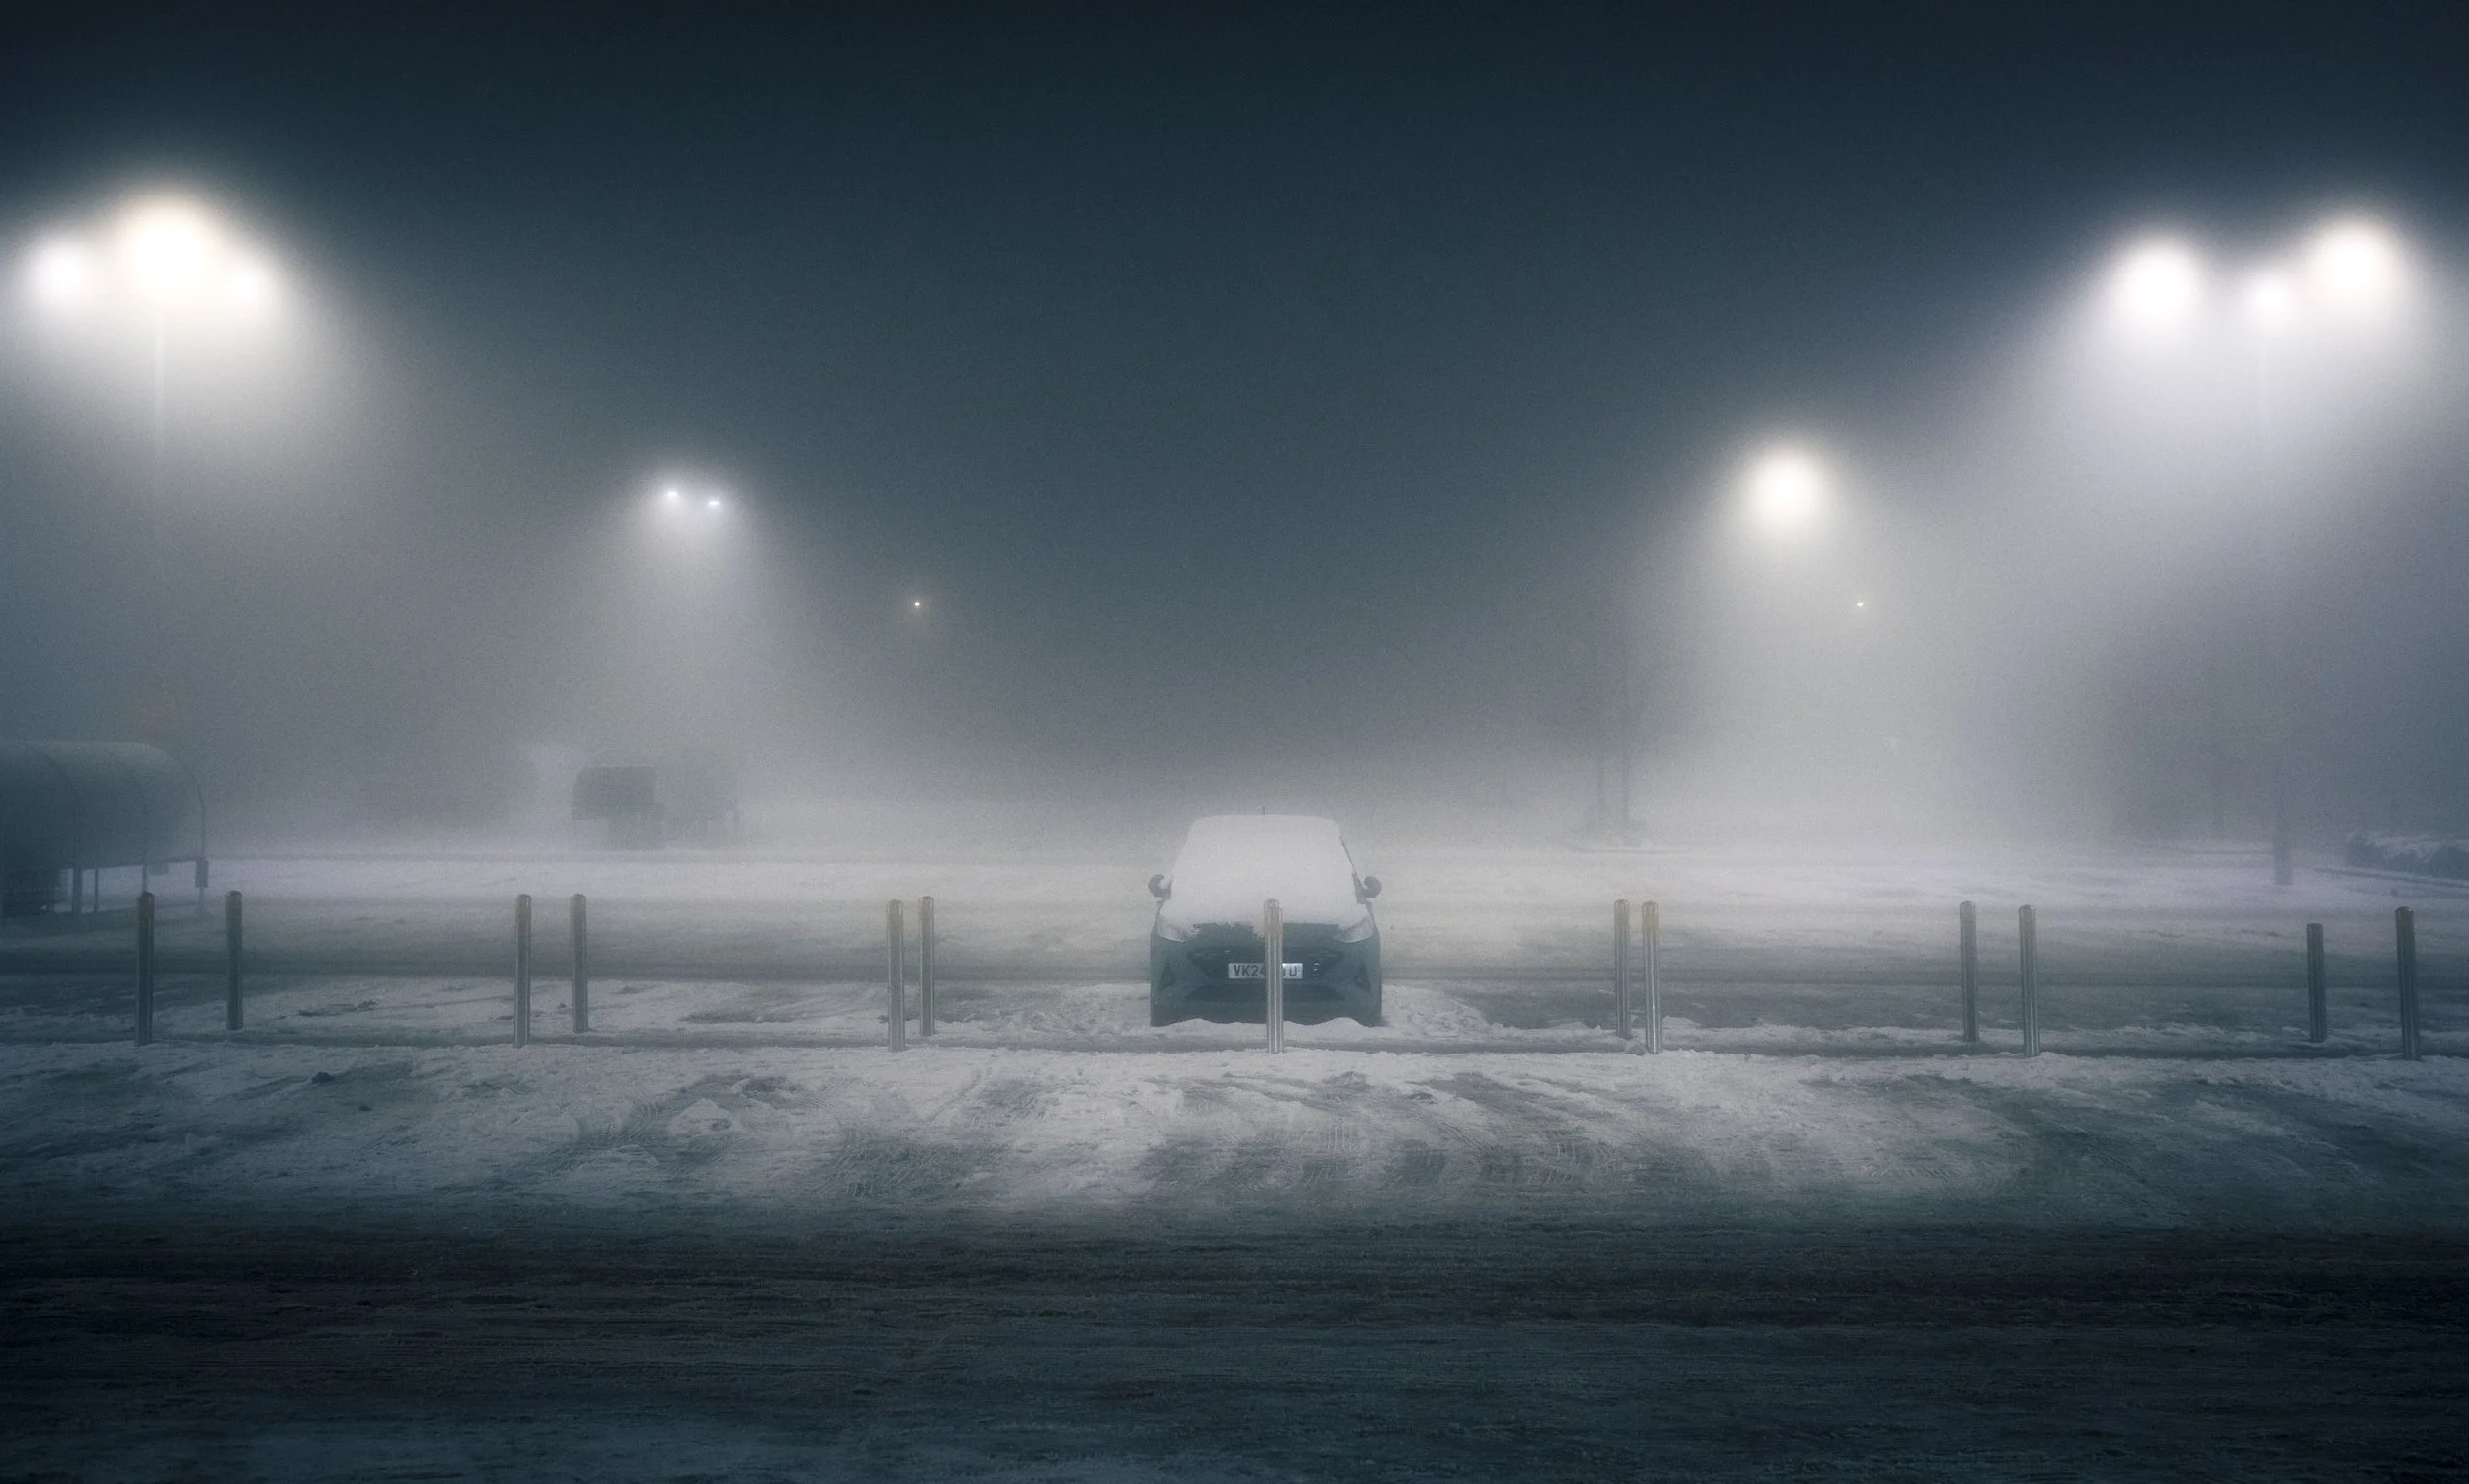
10pm, Tesco Car Park
How to edit dreamy photos
Once the photo is taken, the edit pushes the atmosphere even further. My editing workflow is intentionally simple.
1. Reduce clarity slightly - Takes the edge off the textures. Too much creates mush though, so watch out for that.
2. Pull down dehaze slightly - Adds a subtle, atmospheric softness.
3. Add glow (subtlety is key)
This is where Luminar Neo comes in. I use it alongside Lightroom because it has glow tools and Lightroom just… doesn’t.
The tools I tend to use specifically are:
Glow
Adds highlight bloom similar to a mist filter.Mystical
Adds a soft-contrast glow while deepening shadows.Magic Light
Perfect for enhancing streetlights, buildings, sunsets. dreamy photos blog
Used lightly, these tools give your images the cinematic, ethereal feel without going into ‘Instagram filter from 2012’ territory…!
4. Keep your changes subtle - Dreaminess should enhance the photo, not smother it. Remember, your goal is atmosphere, not haze-overload!

Adding the ‘mystical’ effect in Luminar Neo
There are currently some great offers on Luminar Neo, and you can save upto 77% until Dec 1 2025. If you want to know more, here’s a link (which is an affiliate link but it’ll still get you all the savings!).
Dreamy photography comes down to this
Dreamy images aren’t created by chasing perfection. They’re created by exploration, looking for light in strange places, shooting in imperfect conditions, and editing for atmosphere rather than technical excellence.
Supermarket car parks, foggy street corners, winter evenings, neon reflections, these are where my mind tends to go if I want to create dreamy images. Stay curious, pay attention, and keep experimenting.
More dreamy images…


